
Getting Started with Zotero
Part 1: Installing & Syncing
The first steps to getting started with Zotero are creating an account and installing the program.
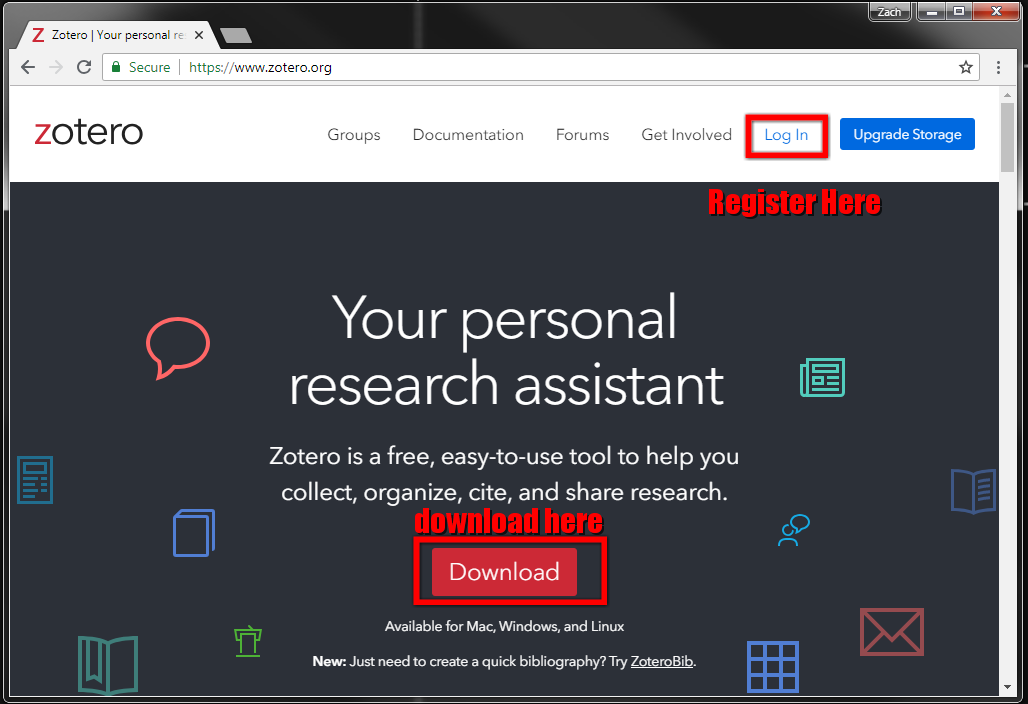
First, let's create an account. This step is optional, but strongly recommended.
Registering an account allows you to sync your library, which ensures you won't lose your work if something happens to your computer, and it allows you to share items with other Zotero users, which is useful for things like group projects. Open up your web browser and navigate to Zotero.org. In the top right, you'll see a link to the registration page. After you've signed up and verified your email address, it's time to move on to installing Zotero.
Once again on the Zotero.org home page, there's a large button labeled "Download Now," which will take you to the download page.
The site should automatically detect your operating system and present the appropriate download link. Click on the large button to download the installer, and then follow the installation process for your operating system.
After the application is installed, come back to the download page and add the Zotero Connector for your browser of choice. Again, this should be automatically detected. (The Safari connector is bundled with the Zotero app and is installed automatically.)
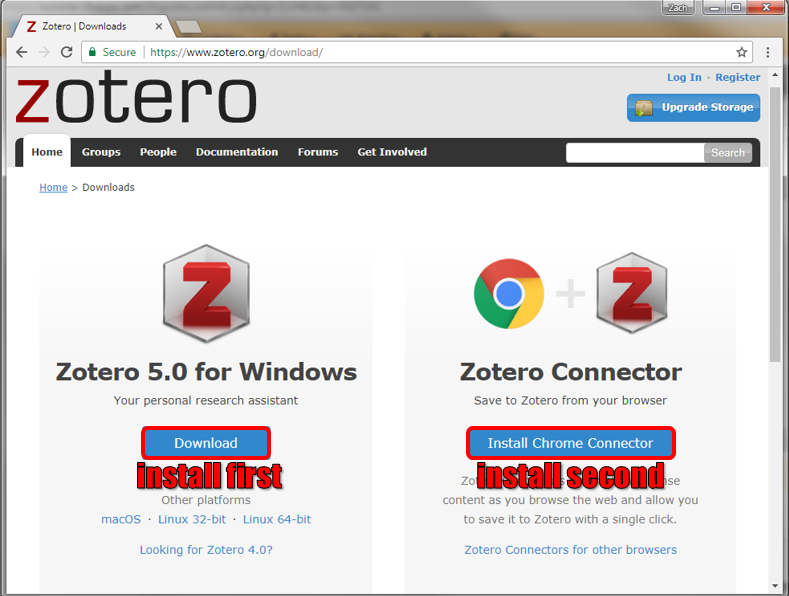
The Zotero Connector will allow you to import items from the web, and it's compatible with all major web browsers.
Finally, before you start using Zotero to organize your research, you'll want to sync the Zotero client with your account.
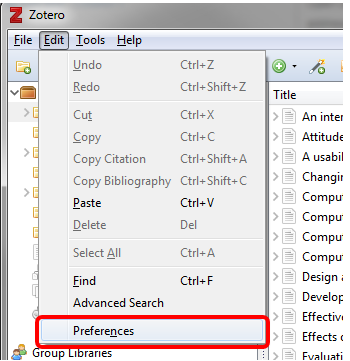
Open up Zotero, and from the "Edit" menu, select "Preferences."
Under the "Sync" tab, enter the username and password that you created at the beginning of this tutorial.
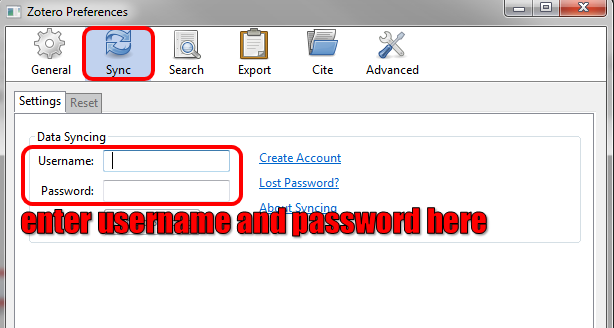
A free account in Zotero comes with 300 megabytes of storage for article metadata and full text content. We recommend keeping the default sync options.
Now you're ready to start adding items to your Zotero library! Click here to advance to part 2 of this tutorial.